Saturday, June 15, 2019

Create "Full Name" field in checkout in Magento 2

The idea is to show a "Full Name" and to hide but NOT to remove "First Name" and "Last Name"

1. Create or Edit di.xml

/app/code/CustomVendor/CustomModule/etc/frontend/di.xml

<?xml version="1.0"?>
<config xmlns:xsi="http://www.w3.org/2001/XMLSchema-instance"
    xsi:noNamespaceSchemaLocation="urn:magento:framework:ObjectManager/etc/config.xsd">
<type name="Magento\Checkout\Block\Checkout\LayoutProcessor">
    <plugin name="checkout_custom_fields" type="CustomVendor\CustomModule\Plugin\Checkout\Model\LayoutProcessor" sortOrder="1"/>
</type>
</config>


2. Add the LayoutProcessor.php app/code/CustomVendor/CustomModule/Plugin/Checkout/Model/LayoutProcessor.php

 /**
 * @param \Magento\Checkout\Block\Checkout\LayoutProcessor $subject
 * @param array $jsLayout
 * @return array
 */
public function afterProcess(
    \Magento\Checkout\Block\Checkout\LayoutProcessor $subject,
    array  $jsLayout
) {
    $shippingConfiguration = &$jsLayout['components']['checkout']['children']['steps']['children']['shipping-step']
    ['children']['shippingAddress']['children']['shipping-address-fieldset']['children'];

    $shippingConfiguration = $this->setFullName($shippingConfiguration);

    return $jsLayout;
}

/**
 * Set "Full Name"
 * @param array $shippingConfiguration
 * @return array
 */
private function setFullName(array  $shippingConfiguration){

    $shippingConfiguration['full_name'] = [
        'component' => 'AdditionalProducts_AdditionalProductsModule/js/checkout/abstract',
        'config' => [
            'customScope' => 'shippingAddress',
            'template' => 'ui/form/field',
            'elementTmpl' => 'ui/form/element/input',
            'options' => [],
            'id' => 'full-name'
        ],
        'dataScope' => 'shippingAddress.full_name',
        'label' => __('Full Name'),
        'provider' => 'checkoutProvider',
        'visible' => true,
        'validation' => [
            'required-entry' => true
        ],
        'sortOrder' => 0,
        'id' => 'full-name',
    ];

    $shippingConfiguration = $this->makeTrackableFirstLastName($shippingConfiguration);

    return $shippingConfiguration;
}


/**
 * Track firstName and lastName
 * @param array $shippingConfiguration
 * @return array
 */
private function makeTrackableFirstLastName(array  $shippingConfiguration){
    $shippingConfiguration['firstname']['tracks']['value'] = true;
    $shippingConfiguration['lastname']['tracks']['value'] = true;

    return $shippingConfiguration;
}


3. Add abastract.js 
app/code/CustomVendor/CustomModule//view/frontend/web/js/checkout/abstract.js
define([
    'Magento_Ui/js/form/element/abstract',
    'mage/translate'
], function (AbstractField, $t) {
    'use strict';

    return AbstractField.extend({
        defaults: {
            modules: {
                firstname: '${ $.parentName }.firstname',
                lastname: '${ $.parentName }.lastname',
            }
        },

        hasChanged: function () {
            this._super();
            this.setFirstLastNameFromFullName();
        },

        /**
         * Extract from the 'Full Name' the 'First' and 'Last' Name
         */
        setFirstLastNameFromFullName : function(){
            var fullValue = this.value();
            var lastSpacePos = fullValue.lastIndexOf(" ");
            var nameLimit = 10;
            var lastNameLimit = 10;

            if (lastSpacePos > 0) { // Ignore values with no space character
                if(fullValue.substring(0, lastSpacePos).length < nameLimit){
                    // Update "firstName"
                    this.firstname().value(fullValue.substring(0, lastSpacePos));
                }
                if(fullValue.substring(lastSpacePos + 1).length < lastNameLimit){
                    // Update "lastName"
                    this.lastname().value(fullValue.substring(lastSpacePos + 1));
                }
            }else{
                if(fullValue.length < nameLimit){
                    // Update "firstName"
                    this.firstname().value(fullValue);
                }
            }
        },
    });
});


More Info see in here.
Friday, September 21, 2018

Consuming Magento 1.x SOAP v2 API with .NET Core 2.x

As we know Magento 1.x offers by default different ways to consume their API: 
  1. SOAP v1 
  2. SOAP v2 
  3. XML-RPC 
  4. REST 
 In this case we are going to make a console app in .NET Core for consuming SOAP v2. 


Source code of this example can be found in Github.


Please:
Also check the problem list at the bottom of this blog. In my case I had running Magento in my Ubuntu using Docker.
Because I will demonstrate in my local environment, ALL the requests will in HTTP only. 
Be sure you don't have SSL with self signed certificate because it won't work.


Let's go! 

Prerequisites:

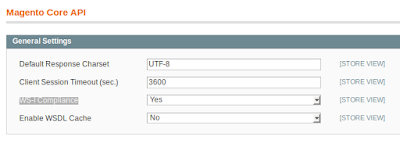
1. Be sure that in Magento the setting in: 
       Configuration > Services > Magento Core API
    Option WS-I Compliance is set to "Yes".

2. Be sure to have to have an API user with access to the resource to consume. 
        System > Web Services > SOAP/XML-RPC 


I will skip the part of installing .Net Core and Visual Studio Code because it depends on your system.


Hands on!

1. Create the .Net Core console app called mageSoap.
     a. Let's move to our Workspace and run this command to create the console app
dotnet new console --output mageSoap


    b. Move to the new project a open it with  Visual Studio Code.
cd mageSoap
code .


2. Let's add some dependencies to the project.
    a. Update your mageSoap.csproj like this.
<?xml version="1.0" encoding="utf-8"?>
<project sdk="Microsoft.NET.Sdk">
  <propertygroup>
    <outputtype>Exe</outputtype>
    <targetframework>netcoreapp2.1</targetframework>
  </propertygroup>
  <itemgroup>
    <dotnetclitoolreference include="dotnet-svcutil" version="1.0.3">
  </dotnetclitoolreference></itemgroup>
</project>
    
    b. Restore the project.
dotnet restore


3. Use the Microsoft WCF dotnet-svcutil tool to generate all the classes.
    a. Check that you can consume the service in Magento. 
        Go to :
            http://localhost.com/index.php/api/v2_soap/index/?wsdl=1
        If you got the XML everything is correct.

        Next, search in the XML for node "soap:address location" and check the link.
        It must be something like this:
              http://localhost.com/index.php/api/v2_soap/index/
        Follow that link and check if you don't have any error like:
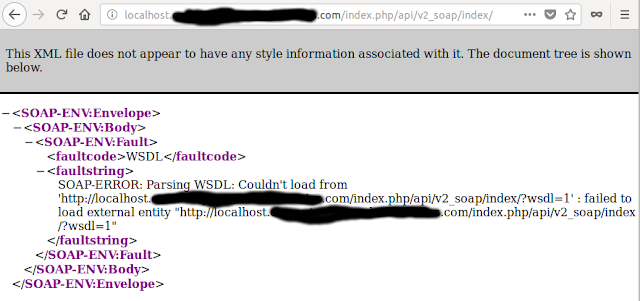
             SOAP-ERROR: Parsing WSDL: Couldn't load from ...
        If so, go to the Problems section.

    b. Run this command from the terminal
dotnet svcutil  -edb -n "*,mageSoap.ServiceReference" http://localhost.com/index.php/api/v2_soap/index/\?wsdl\=1


   c. This will do two things:
        c.1- Create a folder ServiceReference1 with the file Reference.cs


        c.2- Update your mageSoap.csproj adding more dependencies.

<?xml version="1.0" encoding="utf-8"?>
<Project Sdk="Microsoft.NET.Sdk">
  <PropertyGroup>
    <OutputType>Exe</OutputType>
    <TargetFramework>netcoreapp2.1</TargetFramework>
  </PropertyGroup>
  <ItemGroup>
    <DotNetCliToolReference Include="dotnet-svcutil" Version="1.0.3" />
  </ItemGroup>
  <ItemGroup>
    <PackageReference Include="System.ServiceModel.Duplex" Version="4.4.*" />
    <PackageReference Include="System.ServiceModel.Http" Version="4.4.*" />
    <PackageReference Include="System.ServiceModel.NetTcp" Version="4.4.*" />
    <PackageReference Include="System.ServiceModel.Security" Version="4.4.*" />
  </ItemGroup>
</Project>

     c.3- Restore the project again.
dotnet restore

4. Time to play!!!
    a. Update the Program.cs with the following code:
using System;
using mageSoap.ServiceReference;

namespace mageSoap
{
    class Program
    {
        static void Main(string[] args)
        {
            Mage_Api_Model_Server_Wsi_HandlerPortTypeClient client = new Mage_Api_Model_Server_Wsi_HandlerPortTypeClient();

            //log in Magento API to get the session_id
            loginResponse session = client.loginAsync("userAPI","keyAPI").Result;
            string sessionId = session.result;
            Console.WriteLine("Session ID: " + sessionId);

            //Let's get the status from Order "100000010"
            var response = client.salesOrderInfoAsync(sessionId,"100000010").Result;
            salesOrderEntity order = response.result;
            Console.WriteLine("Status in Order: " + order.status);
        }
    }
}

5. See results
   a. Run from your terminal or F5 in Visual Studio Code
dotnet run mageSoap


6. Congrats. It's done!


Problems:
1. Problem in Magento when auto-consuming the SOAP XML.

SOAP-ERROR: Parsing WSDL: Couldn't load from ...


Solution:
This is because Magento try to auto-consume the XML from the PHP container and the container doesn't find the Web-server container in my case Nginx.
Access to the PHP container and add in the /etc/hosts file the IP of the Web-server container.

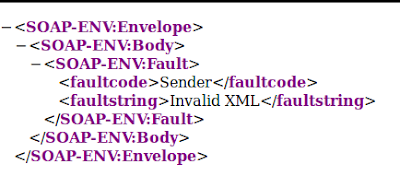
If everything is correct we should get a response as this.


References:
https://docs.microsoft.com/en-us/dotnet/core/additional-tools/dotnet-svcutil-guide
https://devdocs.magento.com/guides/m1x/api/soap/sales/salesOrder/sales_order.info.html

Saturday, November 11, 2017

Install package from private repository using composer from Bitbucket

By the use of composer is very simple to keep a package manager from different dependency in our projects. If you create your own package you must publish it in packagist in order composer can find it to install it. But if you want to have a private repository you must pay a fee in order to allow this from packagist.

So, can I have a private repository where composer can download my packages?
Yes, you can.

Per a request from my friends and family, I created this simple guide to install a package from a private repository that is hosted  in Bitbucket.


Overview


  1. Create SSH keys.
  2. Create my package.
  3. Add to my repository.
  4. Let's do it!


Create SSH

If you already have SSH private and public keys you can skip this step.
If not see Bitbucket guide.

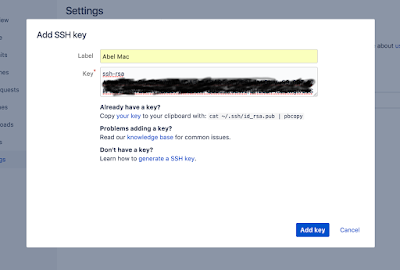
1. Keep in hand the public key we will use it later.


My package

1. Lets create a package called "mypackage".


composer.json

{
    "name": "abelbm/mypackage",
    "autoload": {
        "psr-4": {
            "Abelbm\\Mypackage\\": "src"
        }
    }
}

test.php

namespace Abelbm\Mypackage;

class test {
    public function test(){
        echo "test";
    }
}


2. Add this package in a git repository in Bitbucket with the repository name "mypackage".


3. Push also to your repository the tag "v1.0".


git tag -a v1.0 -m "first version"
git push origin v1.0


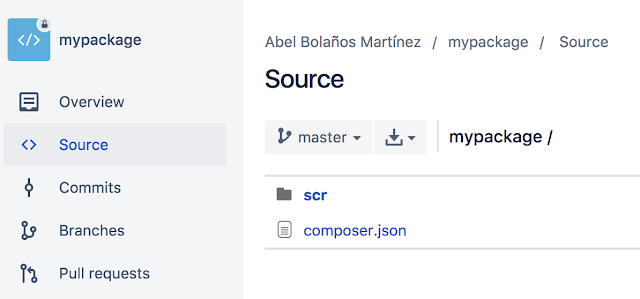
4. Check the tag in your repository.


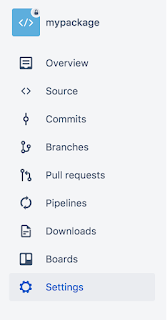
5. Go to the repository's settings.


6. Navigate to the section "Access Keys".


7. Add your public key.


8. Done!


My project

1. Lets say we have our project called "myproject". Add a "composer.json" file.

composer.json

{
    "require": {
        "abelbm/mypackage": "1.0"
    },
    "repositories": [
        {
            "type": "vcs",
            "url":  "ENTER YOUR REPOSITORY PATH"
        }
    ]
}

2. Update the "url" with the SSH path of "mypackage". Example: git@bitbucket.org:abelbmartinez/mypackage.git


3. Using the terminal, navigate to "myproject" folder and run "composer" to install the package.


4. If everything is correct the package should install like a charm. Enjoy!


Sunday, October 15, 2017

Wordpress subdirectory domain in Nginx Ubuntu 16.04

        location /blog {
                root /var/www/html/wordpress/;

                access_log /var/log/nginx/blog.access.log;
                error_log /var/log/nginx/blog.error.log;

                location ~ \.php$ {
                        include snippets/fastcgi-php.conf;
                        fastcgi_pass unix:/run/php/php7.1-fpm.sock;
                }

        }

Wednesday, June 7, 2017

Wednesday, May 24, 2017

Bash to resize images using imageMagick

Taken the idea from unix.stackexchange.com
#!/bin/bash

files=*
W=800
H=600
SIZE_TEST="%[fx:(h>$H && w>$W)]"'\n'

for f in $files
do
    if [ $(identify -format "$SIZE_TEST" "$f") = 1 ]; then
      echo "Resize: $f"
      mogrify -resize ''"$W"x"$H"'' "$f"
    else
      echo "Do not resize: $f"
    fi
done

Tuesday, May 9, 2017

Quick code to test XML-RPC and SOAP 2 in PHP using Magento 1.x

XML-RPC


require_once 'app/Mage.php';

umask(0);
Mage::app();

$host = 'http://test.com';
$user = 'user';
$pass = 'pass';  

$client = new Zend_XmlRpc_Client($host.'/api/xmlrpc/');
$session = $client->call('login', array($user,$pass));

//call resource sales_order.info
$client->call('call', array($session, 'sales_order.info', array('10000001')));

$response = $client->getLastResponse();
$data = $response->getReturnValue();
var_dump($data);

$client->call('endSession', array($session)); 

SOAP 2


ini_set("soap.wsdl_cache_enabled", "0");//no cache

$host = 'http://test.com';
$user = 'user';
$pass = 'pass';  

$client = new SoapClient($host.'/api/v2_soap/?wsdl'); 
$sessionId = $client->login($user,$pass); 
 
//check available types
//$types = $client->__getTypes();
//var_dump($types);

//check available functions
//$functions = $client->__getFunctions();
//var_dump($functions);

$result = $client->salesOrderInfo($sessionId,'900687569'); 
var_dump($result);