Showing posts with label package. Show all posts

Saturday, November 11, 2017

Install package from private repository using composer from Bitbucket

By the use of composer is very simple to keep a package manager from different dependency in our projects. If you create your own package you must publish it in packagist in order composer can find it to install it. But if you want to have a private repository you must pay a fee in order to allow this from packagist.

So, can I have a private repository where composer can download my packages?
Yes, you can.

Per a request from my friends and family, I created this simple guide to install a package from a private repository that is hosted  in Bitbucket.


Overview


  1. Create SSH keys.
  2. Create my package.
  3. Add to my repository.
  4. Let's do it!


Create SSH

If you already have SSH private and public keys you can skip this step.
If not see Bitbucket guide.

1. Keep in hand the public key we will use it later.


My package

1. Lets create a package called "mypackage".


composer.json

{
    "name": "abelbm/mypackage",
    "autoload": {
        "psr-4": {
            "Abelbm\\Mypackage\\": "src"
        }
    }
}

test.php

namespace Abelbm\Mypackage;

class test {
    public function test(){
        echo "test";
    }
}


2. Add this package in a git repository in Bitbucket with the repository name "mypackage".
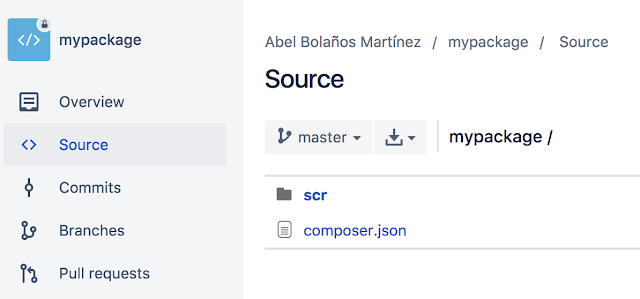


3. Push also to your repository the tag "v1.0".


git tag -a v1.0 -m "first version"
git push origin v1.0


4. Check the tag in your repository.


5. Go to the repository's settings.
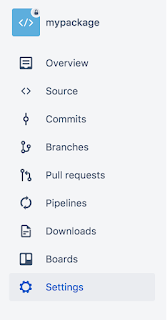


6. Navigate to the section "Access Keys".


7. Add your public key.
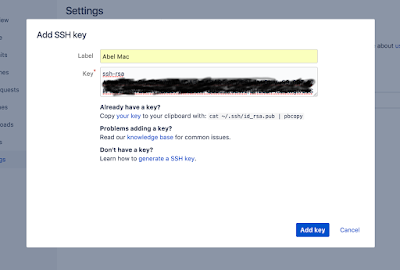


8. Done!


My project

1. Lets say we have our project called "myproject". Add a "composer.json" file.

composer.json

{
    "require": {
        "abelbm/mypackage": "1.0"
    },
    "repositories": [
        {
            "type": "vcs",
            "url":  "ENTER YOUR REPOSITORY PATH"
        }
    ]
}

2. Update the "url" with the SSH path of "mypackage". Example: git@bitbucket.org:abelbmartinez/mypackage.git


3. Using the terminal, navigate to "myproject" folder and run "composer" to install the package.


4. If everything is correct the package should install like a charm. Enjoy!


Monday, August 29, 2011

Creating basic *.deb packages for Debian or Ubuntu

Basic *.deb packages are easy to build, but it can turn more complicated due to the task it should do after or before the install process.

This is a simple  *.deb package.

Name-package_version_architecture/
|
|_DEBIAN/
|      |_control
|
|_Folders that contain the program from the root system/

The folder called DEBIAN is the most important, due to inside it we'll place the scripts for the installation. In this example we only use the control file, which is mandatory in a package.

Let's make this example. Let's say we have this little script called myPC.sh and we want to build it as a package.

Follow this steps:

1.  Make a folder in any place and call it myPC, inside create a folder like this myPC_0.1_all where myPC is the name of the package, 0.1 is the version and all is the architecture, in this example we use all because it doesn't matter if it is i386 or amd64. And the use of the underline(_) is for join the name.

2.  Inside myPC_0.1_all create a folder named as DEBIAN and inside it create a file called control.
Write this in the control file.

Package: myPC
Version: 0.1
Section: MyPrograms
Priority: optional 
Maintainer: Abel Bolaños Martínez <abelbmartinez@gmail.com>
Architecture: all 
Description: My first package
This program show my system name
.
I did it by myself.

The control file has a lot of field but for now we use only these. As you can appreciate we can write in the Description field  an information of our program.

Like this: 

myPC_0.1_all/
|
|_DEBIAN/
        |_control

3.  We want that our script install in /bin folder in our system, that help us to execute the script in any place. So, go to myPC_0.1_all folder and create the bin folder. Inside bin with any text editor create a file called myPC.sh and write this:
uname -a

Save it and open a terminal and change the properties of the file so it can be executed and not modified.
Write this in the terminal:
chmod 755 myPC.sh

We should have something like this:

myPC_0.1_all/
|
|_DEBIAN/
|      |_control
|
|_bin/
     |_myPC.sh

4.  Enough, let's build our package. Open a terminal and placed in myPC folder and type:
dpkg-deb --build myPC_0.1_all/

It's done! you'll see your myPC_0.1_all.deb inside myPC folder.

Now you can install it.